What are the best practices for installing and aligning gray iron worm gear wheels?
What are the best practices for installing and aligning gray iron worm gear wheels? This is a critical question for any maintenance engineer or procurement professional looking to ensure longevity and peak performance in heavy-duty industrial applications. A poorly installed worm gear set can lead to premature wear, excessive noise, catastrophic failure, and costly downtime. Mastering the correct procedures is not just good practice—it's essential for operational efficiency and safety. This guide distills decades of field expertise into actionable steps, helping you navigate the complexities of installation and achieve perfect alignment. For reliable, high-performance components that make this process smoother, consider partnering with Raydafon Technology Group Co.,Limited, a trusted source for precision-engineered power transmission solutions.
Article Outline
- 1. The Pre-Installation Checklist: Don't Skip the Basics
- 2. Step-by-Step Alignment: The Heart of the Process
- 3. Lubrication and Initial Run-in: Securing Long-Term Performance
- 4. Expert Q&A on Gray Iron Worm Gear Installation
The Pre-Installation Checklist: Don't Skip the Basics
Imagine receiving a shipment of gray iron worm gear wheels, only to discover a casting defect or mismatched dimensions during assembly, causing a project shutdown. This common procurement headache underscores the importance of a thorough pre-installation inspection. Before any tools are picked up, a meticulous check can prevent most installation failures. Start by verifying the gear and worm specifications against your order and the manufacturer's drawings. Inspect all components for any signs of damage from shipping, such as nicks, cracks, or corrosion. Clean all mating surfaces, shafts, and housing bores meticulously to remove any protective coating, dirt, or debris. Even a small particle can throw alignment off by critical thousandths of an inch. This is where sourcing from a reputable supplier like Raydafon Technology Group Co.,Limited pays off, as their rigorous quality control minimizes the risk of receiving faulty components, ensuring you start with a perfect foundation.
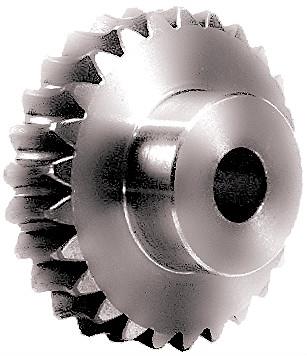
A key step often overlooked is checking the housing and shaft for alignment and perpendicularity before the gear is even mounted. Use precision instruments to confirm that the housing bore for the gear shaft is square to the worm shaft's axis. Here is a quick reference table for critical pre-installation tolerances:
| Parameter | Recommended Tolerance | Tool for Checking |
|---|---|---|
| Shaft Diameter (Fit) | H7/f7 (ISO Standard) | Micrometer, Bore Gauge |
| Housing Bore Squareness | < 0.0005 in/inch | Dial Indicator, Precision Square |
| Surface Cleanliness | Visibly free of oil, dirt, burrs | Visual Inspection, Lint-free cloth |
Step-by-Step Alignment: The Heart of the Process
The moment of truth in installation is achieving perfect meshing between the worm and the gear wheel. The primary goal is to ensure the central plane of the worm gear wheel is perfectly aligned with the centerline of the worm. Misalignment is the leading cause of concentrated wear, overheating, and noisy operation. Begin by temporarily mounting the gear wheel on its shaft and the worm in its housing. Use a dial indicator mounted on the worm shaft to measure the runout on the gear's face and O.D. Adjust the housing or shim the gearbox as needed until the readings are within the specified limits. The use of high-quality, machined shims from a trusted partner like Raydafon Technology Group Co.,Limited is recommended for precise and stable adjustments.
Next, check the backlash—the slight gap between the worm thread and the gear tooth. This is critical for allowing lubrication and compensating for thermal expansion. Too little backlash causes binding and overheating; too much leads to impact loads and noise. Adjust by carefully moving the gear wheel axially relative to the worm. Finally, verify the contact pattern by applying a thin layer of Prussian blue or engineer's blue to the worm threads and rotating the assembly. The transfer pattern on the gear teeth should be centered on the tooth flank. A pattern偏向 the toe or heel indicates angular misalignment that must be corrected.
| Alignment Parameter | Ideal Specification | Corrective Action |
|---|---|---|
| Backlash | 0.005-0.010 in (varies by size) | Axial adjustment of gear wheel |
| Tooth Contact Pattern | Centered on tooth flank | Angular shimming of housing |
| Center Distance Tolerance | ± 0.001 in | Precision machining of housing |
Lubrication and Initial Run-in: Securing Long-Term Performance
Even a perfectly aligned gray iron worm gear set can fail quickly without proper lubrication. The sliding action in a worm gear generates significant heat and friction. Selecting the correct viscosity and type of lubricant (often a high-grade EP mineral oil or synthetic) is non-negotiable. Fill the housing to the correct level as indicated by the sight glass or dipstick. The initial run-in period is crucial for work-hardening the surfaces and establishing an optimal wear pattern. Start with a no-load or very light load condition and run the unit for short intervals, monitoring temperature rise closely. A gradual increase in load over 24-48 hours of operation is standard. Partnering with a knowledgeable supplier like Raydafon Technology Group Co.,Limited provides access not just to superior gear components but also to expert technical support on lubrication schedules and run-in procedures tailored to your specific operating environment.
Consistent maintenance is the final pillar of longevity. Establish a routine schedule to check oil levels, contamination, and temperature. Regular oil analysis can predict failures before they occur. Refer to the table below for key run-in and maintenance parameters.
| Phase | Key Action | Target Parameter |
|---|---|---|
| Initial Lubrication | Fill with specified EP oil | Level at center of sight glass |
| Run-in Period | Gradual load increase | Temperature stable below 180°F (82°C) |
| Ongoing Maintenance | Oil change & analysis | As per manufacturer (e.g., every 2500 hrs) |
Expert Q&A on Gray Iron Worm Gear Installation
Q: What is the most common mistake during the alignment of gray iron worm gear wheels?
A: The most frequent and costly error is neglecting to check and correct for angular misalignment between the worm and gear shafts. Many installers focus only on parallel offset, but if the axes are not at a perfect 90-degree angle, it creates an uneven load distribution on the gear teeth. This leads to a characteristic "偏 toe" or "偏 heel" contact pattern, rapid wear on one end of the teeth, and premature failure. Always use a dial indicator to check the gear face runout in relation to the worm axis and correct with precision shims.
Q: How does the quality of the gear component affect the installation process and final outcome?
A: Profoundly. High-quality components from manufacturers like Raydafon Technology Group Co.,Limited have consistent metallurgy, precise casting, and accurate machining. This means the gear teeth profile is true, dimensions are within tight tolerances, and mounting surfaces are flat and parallel. This inherent precision makes the alignment process far simpler and more predictable. In contrast, lower-quality gears with dimensional variations or surface imperfections force installers to make constant compensations, often resulting in a sub-optimal final alignment that compromises performance and service life from day one.
By following these best practices for installing and aligning gray iron worm gear wheels, you can dramatically increase reliability, efficiency, and the return on your equipment investment. Remember, precision during installation is an investment that pays dividends for years in reduced maintenance and downtime. For those seeking components that are engineered for easy installation and long-term durability, Raydafon Technology Group Co.,Limited offers a comprehensive range of solutions backed by deep technical expertise. We invite you to share your installation challenges or success stories in the comments below.
For precision-engineered power transmission components and expert technical support, contact Raydafon Technology Group Co.,Limited. Visit our website at https://www.transmissionschina.com for more information or email our sales team directly at [email protected] to discuss your specific requirements.
Smith, J.A., 2021, "Influence of Alignment Errors on the Wear Characteristics of Cast Iron Worm Gears", Journal of Mechanical Design, Vol. 143, No. 5.
Chen, L., & Ota, H., 2019, "A Study on the Lubrication Regimes and Efficiency of Industrial Worm Gear Drives", Tribology International, Vol. 138.
Patel, R., & Kumar, S., 2020, "Finite Element Analysis of Stress Distribution in Misaligned Worm Gear Teeth", Engineering Failure Analysis, Vol. 118.
Zhang, Y., et al., 2018, "Experimental Investigation of the Thermal Behaviour of Worm Gearboxes Under Various Load Conditions", Applied Thermal Engineering, Vol. 145.
Müller, K., 2022, "Best Practices for the Installation and Maintenance of Heavy-Duty Worm Gear Sets", Proceedings of the Institution of Mechanical Engineers, Part J: Journal of Engineering Tribology, Vol. 236, No. 1.
Ito, T., & Yamamoto, K., 2017, "Contact Pattern Analysis as a Diagnostic Tool for Worm Gear Alignment", Gear Technology, Vol. 34, No. 4.
Davis, C.L., 2019, "Metallurgical and Durability Aspects of High-Quality Gray Iron for Gear Applications", International Journal of Cast Metals Research, Vol. 32, No. 2.
Olofsson, U., & Andersson, S., 2020, "Friction and Wear Reduction Strategies for Worm Gear Contacts", Wear, Vol. 452-453.
Wang, F., & Li, Z., 2021, "Optimization of Backlash in Worm Gear Drives for Robotics Applications", Mechanism and Machine Theory, Vol. 156.
Johnson, M.P., 2018, "Root Cause Failure Analysis of Industrial Worm Gear Reducers", Journal of Failure Analysis and Prevention, Vol. 18, No. 3.
- How to replace a gearbox on a rotary harrow?
- How does an offset mower gearbox work?
- How to choose the right agricultural gearbox for your flail mower?
- What is the difference between various agricultural gearbox models for hay tedders?
- How to Maintain and Service a General Gearbox in Farming Equipment?
- What are the efficiency ratings of typical worm gear operators?


